
Receiving
Receiving is how stock gets into Shopify. Each receipt against an issued purchase order raises the available quantity at the order’s location, with the reason “received”. Partial deliveries are fine; receive what came and leave the rest outstanding.
Three ways to receive
Section titled “Three ways to receive”- Receive on a single line. Enter the quantity that arrived.
- Receive shipment for the whole delivery. Every line starts at what’s still outstanding; adjust and confirm.
- Scan to receive for counting a box with a scanner. It takes over the screen while you count.
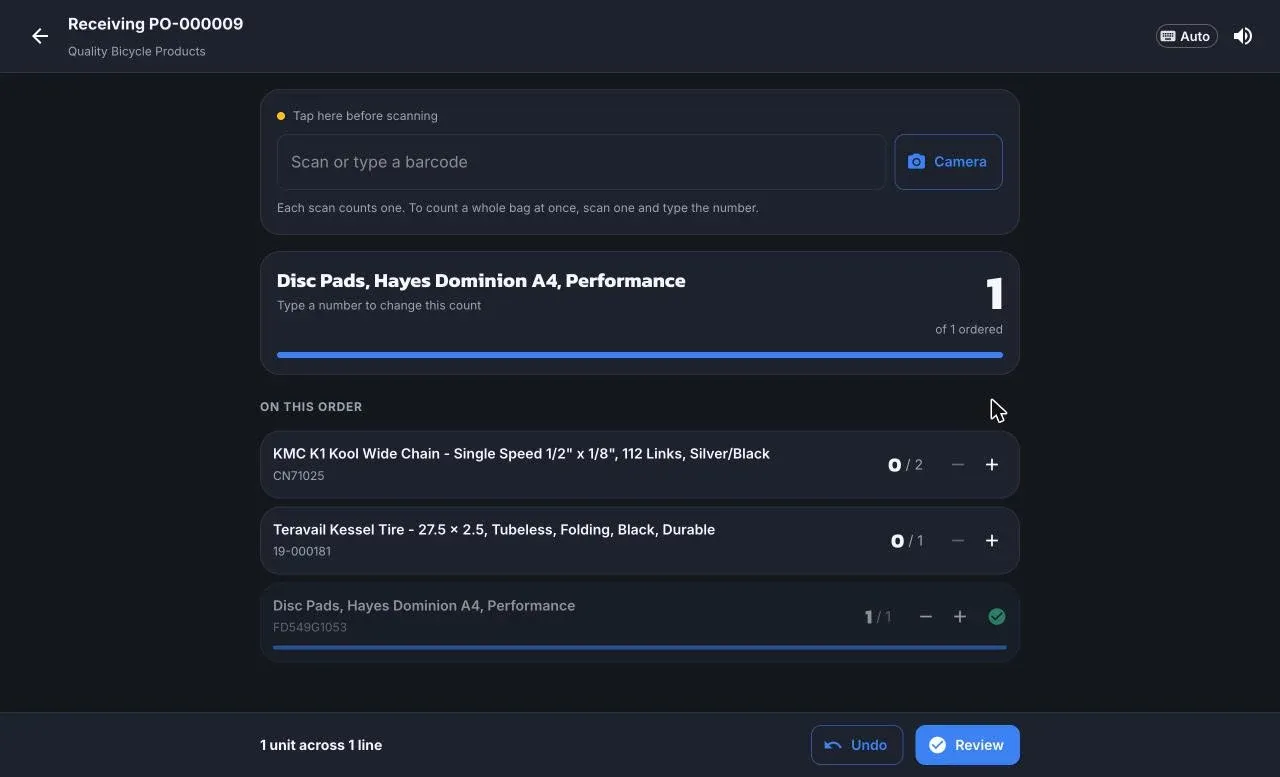
Scan to receive
Section titled “Scan to receive”- Choose Scan to receive on the order.
- Scan each item as you unpack. In Auto mode a handheld scanner counts one per scan and the camera asks how many. Undo removes the last scan. Counts are kept if you leave and come back.
- Items that aren’t on the order collect in their own strip. At Review, choose Add to order & receive (added at zero cost, so fix the cost from the invoice) or Discard.
- Confirm. The receipt is created and stock is updated.
After receiving
Section titled “After receiving”- Each receive is numbered on the Receipts tab. Void receipt reverses the stock change if it was a mistake.
- Special orders on a received line move to Received and are reserved for their customers. A banner reminds you to sort them onto the hold shelf or the bike. See From arrival to pickup.
- Labels don’t print on their own. Use Print tags on the receipt (defaults to what that receipt received) or Print → Item labels for the whole order. To print automatically as you receive on this device, turn on Auto-print item labels when receiving in Settings → Printing.
The order becomes Complete when every line is fully received or closed short.
© 2026 Zack Dot Solutions LLC. All rights reserved.