
Create a work order
From the dashboard choose Service → New Work Order. The same steps are available from the New Work Order tile in Shopify POS.
1. Who is the customer?
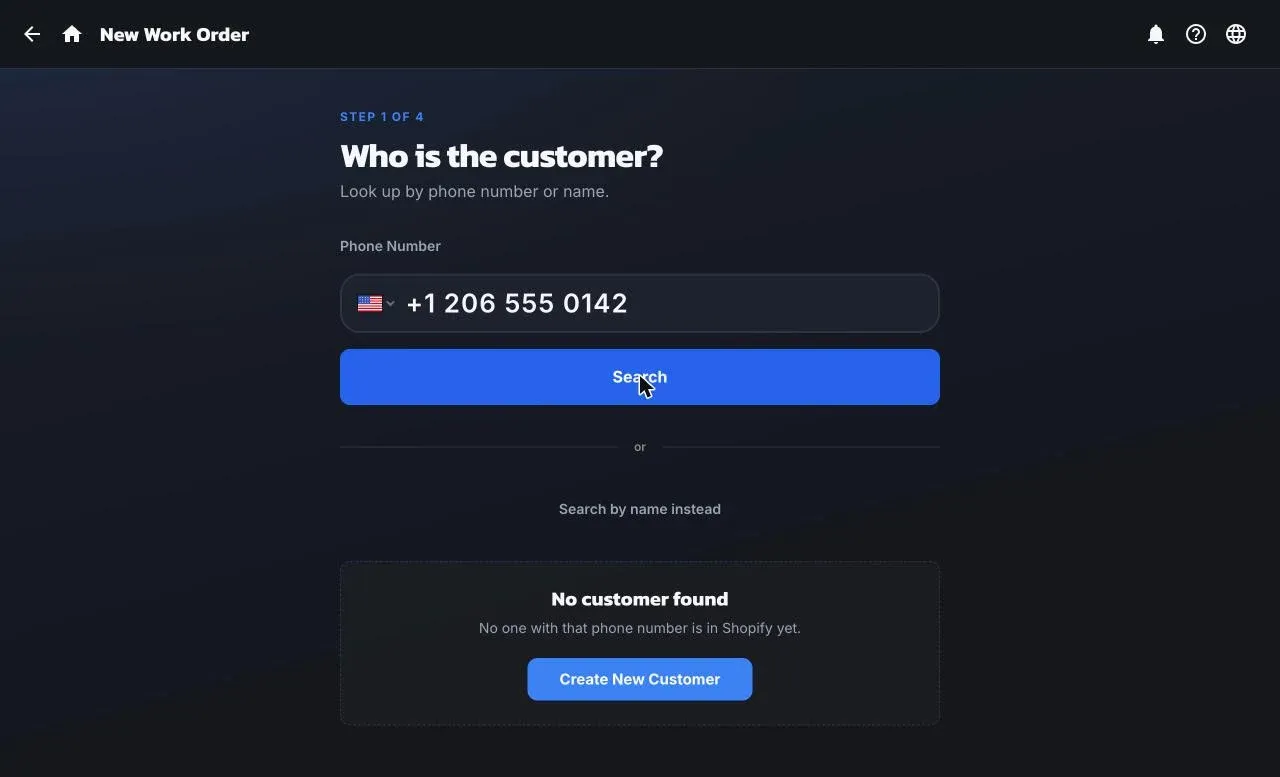
Section titled “1. Who is the customer?”Search by phone number, or switch to Search by name instead. Customers are your Shopify customers, so anyone who has bought from you is already here.
If no one matches, choose Create New Customer. First name, last name, and phone are all required. The new customer is created in Shopify.
Whenever a customer has no text consent on file, ShopTech asks you to read the consent script and record their answer. See Text message consent.
2. What’s being serviced?
Section titled “2. What’s being serviced?”A service item is the customer’s bike or whatever they dropped off. Items already on file are listed; pick one, or choose Add New Service Item and enter the Make / Model (required), plus Color and Size if you want them on the tag.
Service items stay on the customer’s record, so the next visit starts from the same bike.
3. When will it be ready?
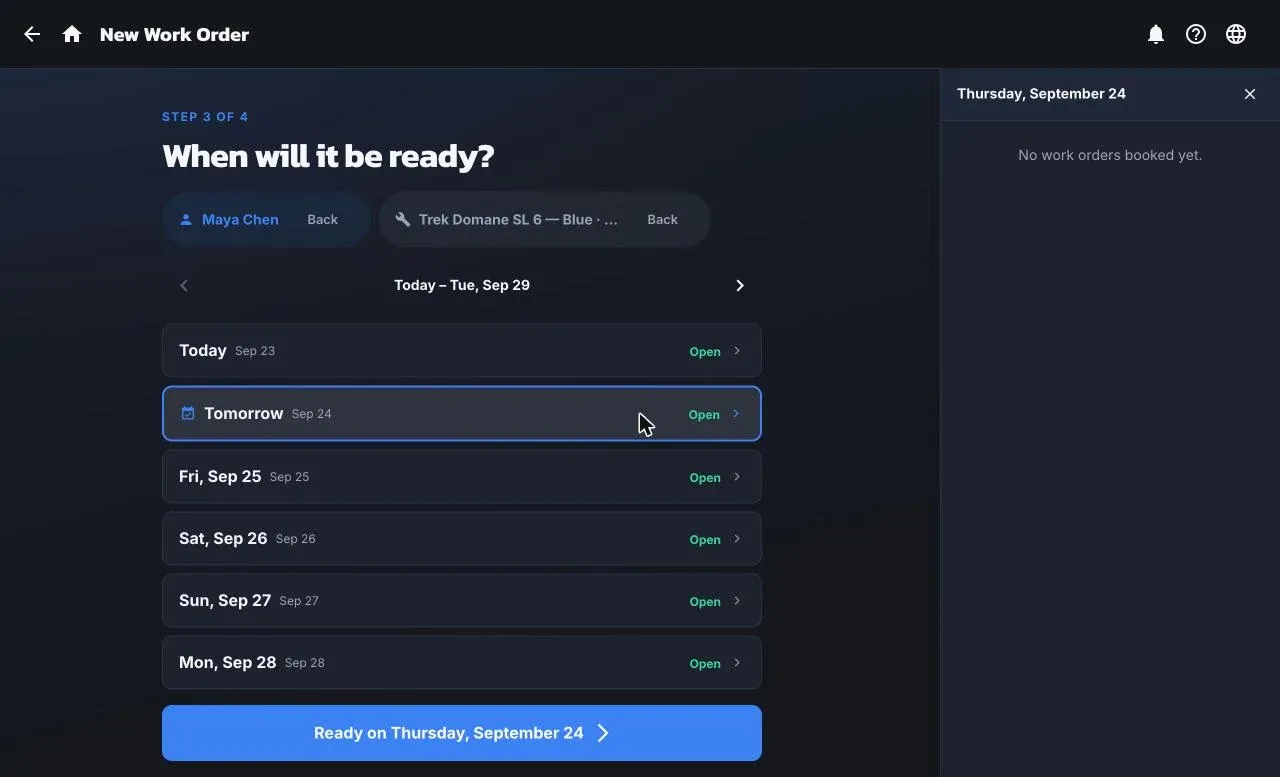
Section titled “3. When will it be ready?”Pick a day on the week view. Each day shows how many work orders are already booked, so you can see where the shop has room. Past days are greyed out and holidays are marked. Use the arrows to look at other weeks.
Choosing Ready on {date} creates the work order. Until this point nothing is saved.
4. Build the order
Section titled “4. Build the order”Add what the job needs from the Labor and Products tabs. Each line is saved as you add it, and the Estimated total updates, including tax if a rate is set in Settings.
- Labor lists your labor products, top sellers first. Search, or choose Add custom labor for something that isn’t a product.
- Products browses your Shopify collections, starting with the one set as Frequently used products in Settings. The In stock filter is on by default. Search by name, part number, or barcode, or scan one. Search supplier catalog finds a part you don’t stock, imports it into Shopify, and flags the line as a special order.
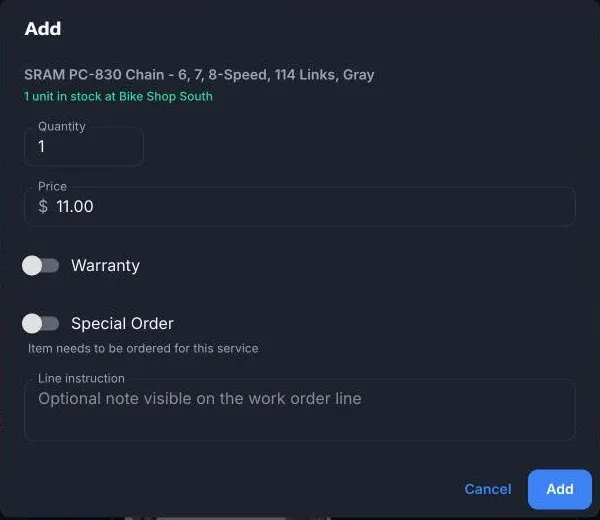
When you add a line you can set the Price, mark it Warranty so the customer isn’t charged, mark it Special Order if it has to be ordered in, and add a Line instruction the tech will see on the line. ShopTech ticks Special Order for you when the product is out of stock at your location.
For something you can’t pin down yet, add a custom line and switch on Placeholder: “exact product to be decided” or “price to be quoted”. Your shop’s Common placeholders from Settings appear as chips. A placeholder has to be resolved before the job can be finished.
Write anything the tech or the customer should know in Notes. Notes print on the drop-off receipt. Add Photo attaches a picture of the item as it came in.
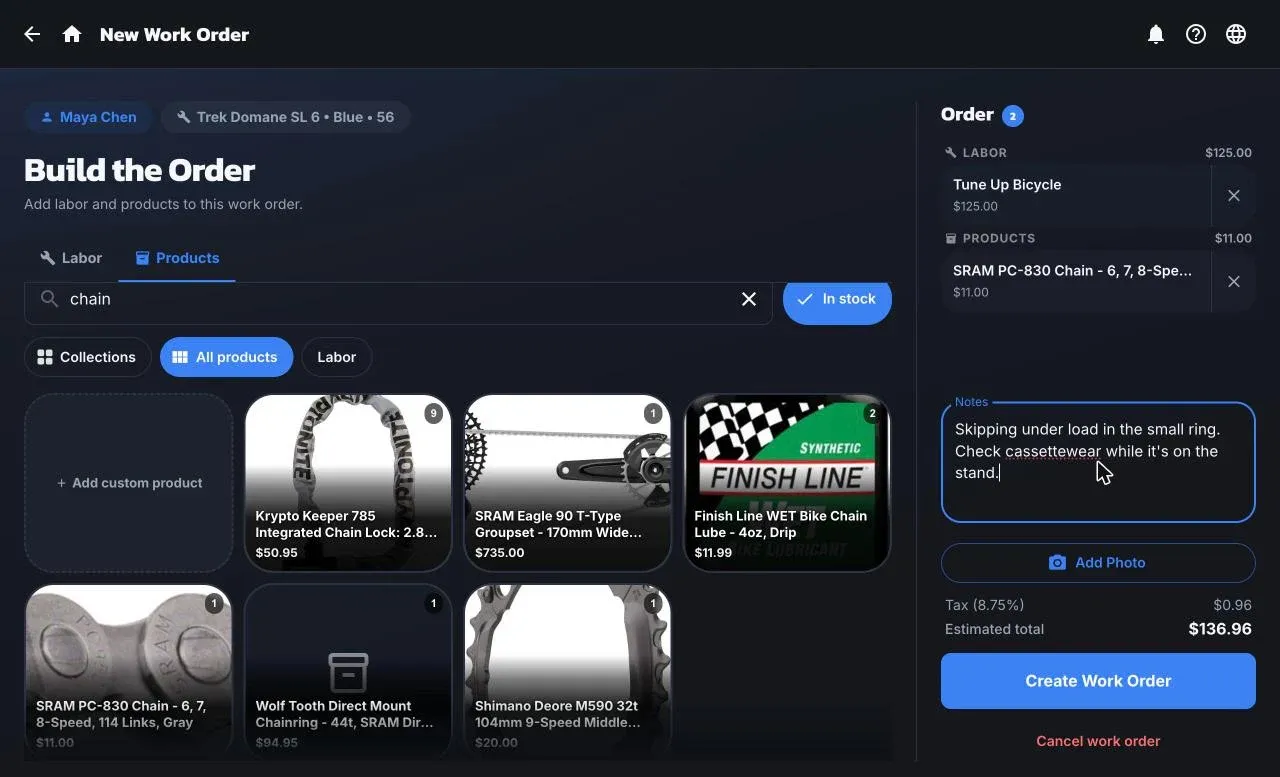
Choose Create Work Order. If any line is a special order, ShopTech offers to set the job to Awaiting Products right away.
Work order created
Section titled “Work order created”The done screen shows the number, the ready date, and the estimated total.
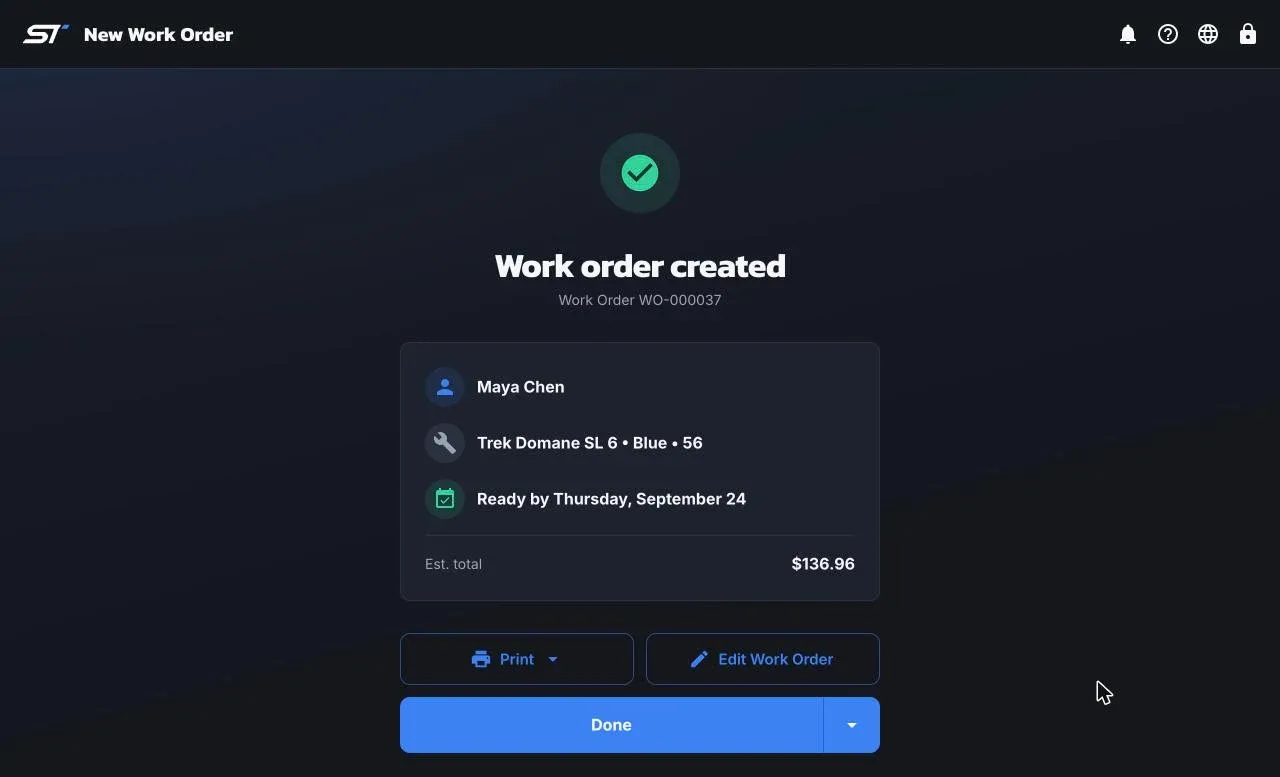
- Print offers the Item Tag for the bike, the Drop-off Receipt for the customer, or Print Both. Turn on Auto-print on new work order in Settings → Printing to print both automatically on this device.
- The arrow next to Done offers Text drop-off confirmation, which sends the customer a text with a link to their repair tracker. Useful when the printer is down.
- Edit Work Order opens the job. Done starts the next one.
See Printing for what’s on each document.